Tackling Trello and Teamwork!
As I continue along on my treacherous software engineering journey, I recently came across an obstacle that I didn’t expect to be an issue in the first place — collaboration. Amidst a new project week I went from a solo team to a trio, and for a very visual learner like myself, just writing out the tasks on a Google Doc doesn’t cut it.

Insert Trello to the rescue. Trello is a list-making style web application for all types of projects, with the intention of breaking down task responsibilities and tracking task statuses. Upon creating an account, you’ll be prompted to enter the name of the team you’re trying to manage, the type of team it is, and add your teammates’ emails so they can have access to whatever boards are created. All of these attributes can also be altered at any time.

Upon filling out your team information, you should be taken to a show page for your newly created team. From here is where you can manage or create different boards associated with your team. We have the option to browse a wide variety of templates that Trello has, or we can start from scratch.

For the sake of this article, let’s go to the template gallery and select from the ‘Engineering’ category.

Once we have a list of the templates geared towards Engineering, let’s choose one! Using a template is a great way to become familiar with the different functions that Trello offers in their boards. I’ve selected the popular Kanban template.

Once you choose a template, you should be able to see a direct visual example of what the board’s layout will look like, and the different names of tabs to keep track of. Furthermore, you can select whether you want the board to be public or private. I gave our board a title of “Dream Team Board.” Now let’s see it in action:

Hopefully with this image you can begin to see the magic that could happen. In this board there are Lists and Cards. Each list holds a set of cards, and it’s in those cards that we specify the task to be completed, information about the task, and who the task belongs to. Based off of the template Kanban gave us, our lists are:
- Backlog — For staging tasks and brainstorming/planning about what needs to be done
- Design — For talking about the ways the information from the Backlog can be implemented, as well as including additional resources pertaining to the application for everyone to easily access such as links, visual references, etc.
- To-Do — A list of tasks that have been green lit and are ready to begin.
- Doing — A list of pending tasks currently being worked on.
- Code Review — A list of tasks that are set to be reviewed before being moved to Done. This list uses the “List Limit” feature, which essentially puts a limit to the amount of cards that can be in this particular list at one time.
- Done — A list of completed tasks.
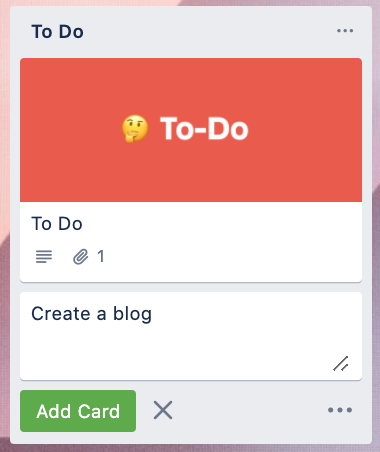
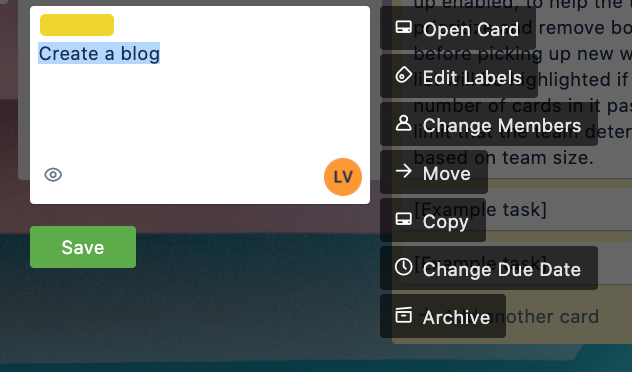
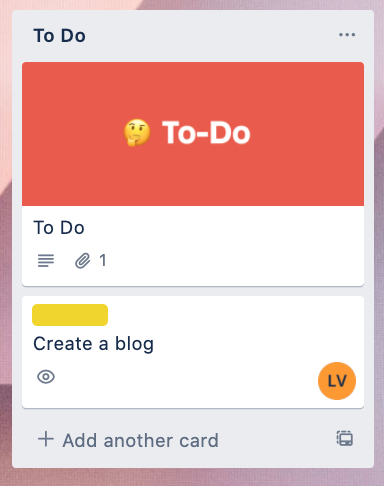
Of course these are all customizable. Let’s practice adding a new card to the To-Do list. Click “Add card” and writing the name of the task you want completed. Clicking on the elipses in the corner will give you the option to add specific members names to the task, or different labels to determine what category that task resides under. Let’s go ahead and complete it. Once we’re finished, we now have a task titled “Create a blog” with a yellow label, and we can see that that task belongs to me based on the initials LV.
Once the task is completed, we are free to drag and move it to wherever we see fit. In this instance, I’ll move it to the Done list.
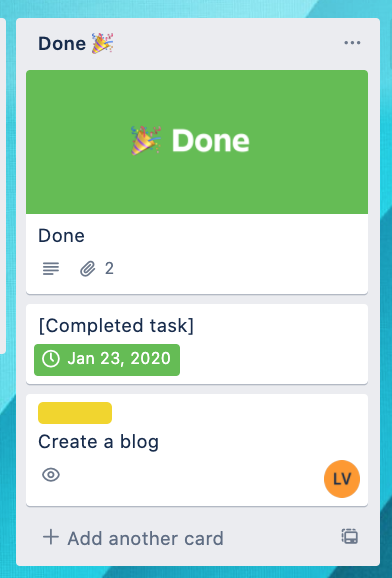
We can similarly go in and add a date to the task by editing it the same way if we want to see the time of completion! Feel free to customize your Lists and Tasks to meet the needs of whatever it is you’re trying to build. Happy Coding!